

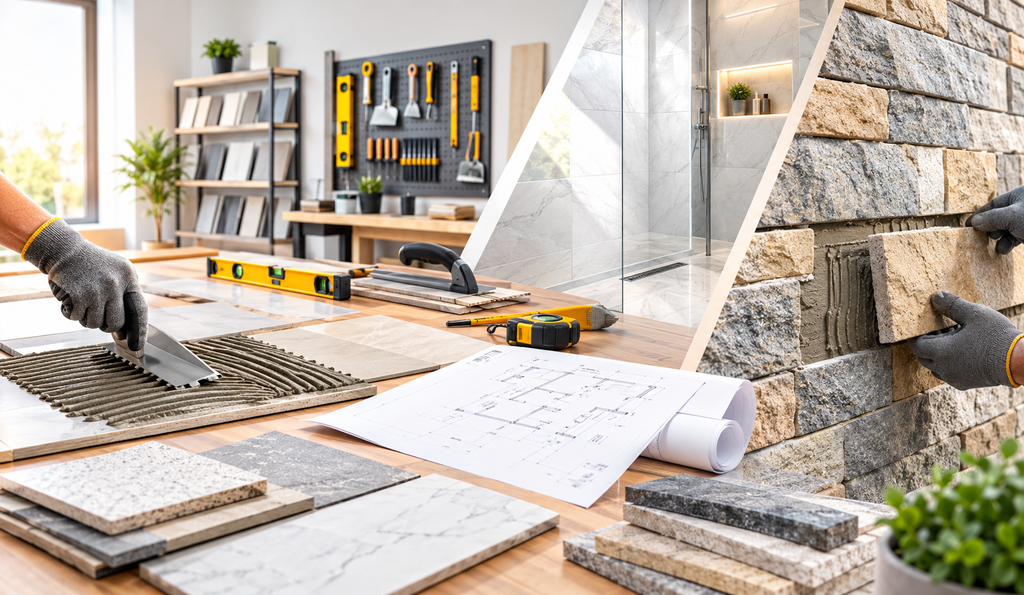
Tile failures rarely happen by accident. Moisture seeps under the surface, buildings shift, and traditional cement mortars lose their grip. Installers and homeowners now look for a tile bonding adhesive that flexes, resists water, and holds for years. Viaduct Chemtech supplies PU adhesive for tile and polyurethane adhesive for tiles that meet these demands, and this guide explains how they work, where they fit, and how to apply them correctly.
Key Takeaways
- Polyurethane adhesive stays flexible, so it absorbs vibration and thermal movement without cracking.
- It works as a waterproof tile adhesive, which makes it a strong choice for wet and outdoor areas.
- It bonds to concrete, metal, wood, and existing tiles.
- Correct surface preparation and trowel technique decide the quality of the final bond.
- Curing time, coverage, and substrate type determine which product suits each job.
What Is PU Adhesive for Tiles?
PU adhesive for tiles is a moisture-curing bonding agent based on polyurethane chemistry. It reacts with ambient humidity and the substrate, then forms a tough, elastic layer between the tile and the surface. Unlike cement-based mortar, which hardens into a rigid bed, this adhesive stays slightly flexible after curing.
That flexibility matters. Floors expand in summer heat, walls settle over time, and heavy foot traffic sends constant vibration through the surface. A rigid bond cracks under this stress. An elastic bond moves with it, and the tile stays in place.
Key Benefits of Polyurethane Adhesive for Tiles
Strong, lasting grip. As a tile adhesive for strong bonding, polyurethane grips both porous and non-porous materials. Large-format porcelain, natural stone, and glass tiles all sit firmly on it.
Water resistance. Water cannot penetrate the cured layer, so it works as a dependable waterproof tile adhesive in bathrooms, kitchens, balconies, and swimming pool surrounds. Mold and mildew find little room to grow beneath the tile.
Flexibility under stress. The cured film absorbs shocks from temperature swings and structural movement. Hairline cracks and hollow-sounding tiles appear far less often.
Fast, clean application. Many polyurethane formulations arrive ready to use. Installers skip mixing, avoid inconsistent batches, and reduce site waste.
Chemical and temperature tolerance. The adhesive withstands cleaning agents, moderate heat, and freeze-thaw cycles, which suits commercial and outdoor projects.
Where Installers Use PU Adhesive for Tiles
Professionals choose this adhesive wherever standard mortar struggles:
- Wet areas: bathrooms, showers, laundry rooms, and kitchens
- Exterior surfaces: terraces, patios, balconies, and building facades
- Tile-over-tile renovation: the adhesive bonds directly to old glazed tiles and saves demolition time
- Metal and wooden substrates: staircases, platforms, and prefabricated panels
- Vehicles and marine interiors: surfaces that vibrate constantly
- Commercial spaces: malls, hospitals, and kitchens that face heavy traffic and frequent washing
Application Guide: How to Install Tiles Step by Step
Good results start with preparation. Follow this sequence for a reliable installation with PU adhesive for tiles.
1. Prepare the surface. Clean the substrate thoroughly. Remove dust, oil, grease, wax, and loose particles. The surface must stay dry, firm, and level. Grind high spots and fill deep holes before you start.
2. Check moisture and temperature. Confirm that the substrate holds acceptable moisture levels and that the ambient temperature falls within the manufacturer’s range. Extreme cold or heat changes the curing speed.
3. Apply a primer when required. Porous or dusty substrates often need a primer. Read the technical data sheet to see whether your surface calls for one.
4. Spread the adhesive. Pour the adhesive onto the surface and spread it with a notched trowel. Choose the notch size according to tile dimensions: larger tiles need deeper notches. Work in small sections so the adhesive does not skin over before you place the tile.
5. Back-butter large tiles. For tiles bigger than 300 mm, apply a thin layer of adhesive to the back as well. This step eliminates air pockets and improves contact.
6. Place and press. Set each tile with a slight twisting motion, then press firmly. Use spacers to keep joints even, and check alignment with a level.
7. Remove excess immediately. Wipe off adhesive from tile faces and joints while it stays wet. Cured polyurethane resists removal.
8. Allow proper curing. Keep foot traffic off the surface for the period the manufacturer specifies. Grout only after the adhesive develops enough strength.
Common Mistakes to Avoid
Installers often trowel too much adhesive at once, which lets it skin over before the tile goes down. Others skip surface cleaning and then wonder why the bond fails. Some ignore the open time listed on the product sheet. Each of these errors weakens even the best tile bonding adhesive, so follow the instructions on every project.
Choosing the right product also shapes the result. Match the adhesive to the tile type, the substrate, and the exposure level. Interior wall tiles need less strength than outdoor porcelain slabs, and PU adhesive for tiles performs best when the installer selects the grade that fits the load, moisture, and movement of the specific site.
Bring Stronger Bonds to Your Next Project
Tile work rewards careful material selection. Viaduct Chemtech offers polyurethane adhesive solutions built for demanding surfaces, and technical guidance is available for contractors and builders who want to match the right formulation to their site conditions. Reach out to the team to discuss your substrate, tile size, and environment.
Frequently Asked Questions
1. Can I use polyurethane adhesive for tiles on bathroom floors?
Yes. Its water resistance and flexibility make it well suited to bathroom floors, where moisture and movement cause the most failures.
2. How long does PU adhesive take to cure?
Curing time depends on temperature, humidity, and layer thickness. Most products reach initial strength within several hours and full strength within a few days. Check the technical data sheet for exact timings.
3. Can I install new tiles over old tiles with this adhesive?
Yes, provided the old tiles sit firmly and you clean and degrease them first. Roughen glazed surfaces or apply a primer if the manufacturer recommends it.
4. Is PU adhesive better than cement-based tile adhesive?
It offers more flexibility and water resistance, so it performs better on moving, wet, or non-porous substrates. Cement-based options still work well for standard dry, stable interiors.
5. Does polyurethane adhesive work with natural stone?
Yes. Choose a formulation designed for stone, since some adhesives can stain light-colored marble or limestone.